Setting up MS AD FS 2019 as brokered identity provider in Keycloak
This blog post was written together with Johan Peeters and Aspect Analytics, during the realisation of a Proof of Concept which integrates access control into the solutions the people at Aspect Analytics are creating.
In March 2017, the folks at Keycloak published a blog post entitled How to Setup MS AD FS 3.0 as Brokered Identity Provider in Keycloak. Since, the world has moved on. AD FS is at version 5.0 in the old versioning scheme - apparently Microsoft now prefers to label AD FS with the version of Windows Server it ships with. So AD FS 2019. OpenID Connect (OIDC) has emerged as the dominant identity protocol and SAML, which the Keycloak blog featured, has been relegated to the legacy league. So here’s an update with ‘Modern Authentication’.
Note that AD FS 2016 is also expected to work, though this was not tested. Feel free to leave a comment if it worked for you.
Prerequisites
Two server machines:
- Microsoft Windows Server 2019 with AD and AD FS roles installed.
- Server with Keycloak installed. We are using the docker container in this post.
Both AD FS and Keycloak are available over HTTPS:
- AD FS is running on https://adfs.domain.tld
- Keycloak is running on https://keycloak.domain.tld (see here for setting up TLS in Keycloak)
The easiest way to get started is to make sure that at least the AD FS HTTPS certificate is one issued by a trusted CA (e.g. by using a Let’s Encrypt certificate). Alternatively, you can add the AD FS HTTPS certificate to Keycloak’s truststore.
Adding Keycloak as a client in AD FS
Since we will use AD FS as a brokered Identity Provider, Keycloak must be defined as an OAuth 2 client. To do so, we first need to create an Application Group, the AD FS entity that models a set of protected resources and the clients that can access them. OAuth distinguishes 2 types of clients, public and confidential. The former run on devices controlled by an end user, e.g. in a desktop browser or on a phone, the latter in the back-end. Microsoft calls these somewhat confusingly native and server applications respectively. A server application is what we need here.
Keycloak will retrieve an ID token as a client and then construct an identity on the basis of the claims in the AD FS ID token. But some of the information that we want is not available as a standard ID token claim, hence we need to set up some custom claims. It turns out that we need an API in our Application Group to do so.
Creating a server application
In AD FS, browse to ‘Application Groups’, and then click ‘Add Application Group…’ in the actions pane.
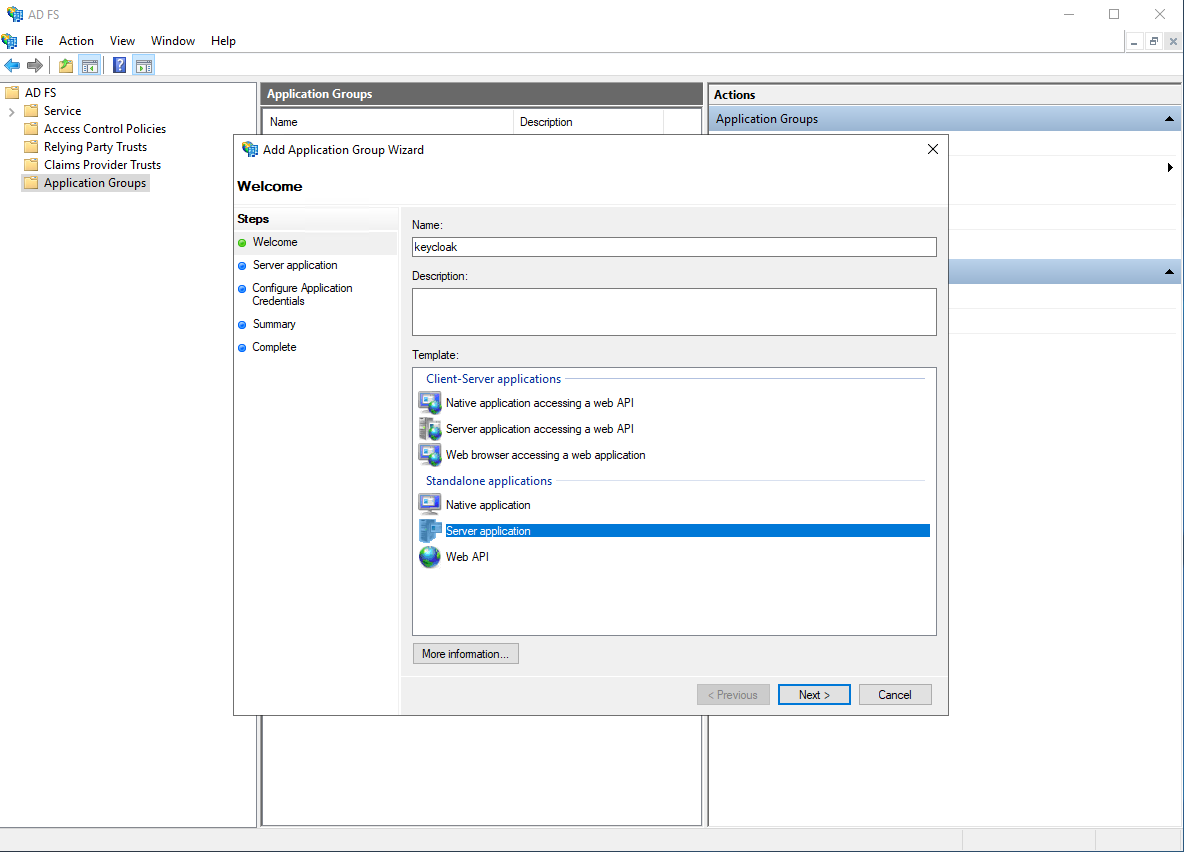
Follow the wizard, in this post we will assume the following values are used:
- Client Identifier:
keycloak - Redirect URI:
https://keycloak.domain.tld/auth/realms/master/broker/ADFS/endpoint - Credentials: Generate a shared secret - we will need this secret later
The redirect URI will be different in case multiple realms have been created in Keycloak. We will be able to verify this URI later when we get to the Keycloak config.
Validate the configuration and finish the wizard. The ‘keycloak’ application group should have been created.

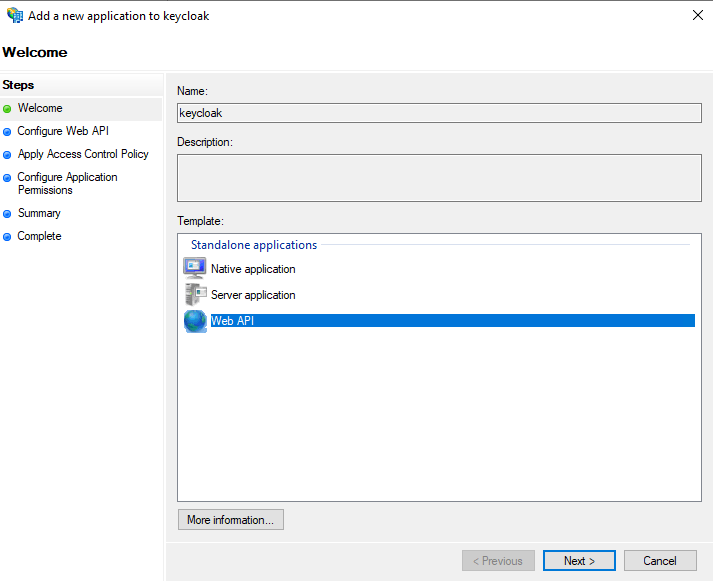
Creating a dummy API
In order to customize the id token that is returned to Keycloak, we need to set up a dummy API. If you think that’s weird, rest assured - you are not alone. In fact, it gets worse: we will create this fictitious API to construct a model of an access token so that we can import the access token claims into the ID token. Microsoft owes us an explanation, if not an apology. In the meantime, let’s get it done.
Double click the ‘keycloak’ application group, and click ‘Add application…’. We will add a dummy ‘Web API’ application to the application group.
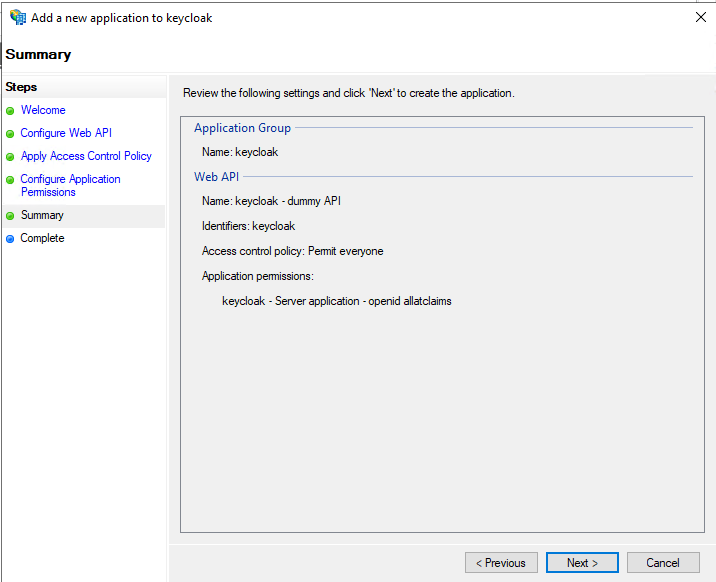
Follow the wizard, and use the following values:
- Name:
keycloak - dummy API(you are free to choose another name of course) - Identifier:
keycloak(this must be exactly equal to the Client Identifier of the server application) - Access control policy: Permit everyone
- Permitted scopes: check
allatclaimsin addition to theopenidscope which is checked by default
The allatclaims scope tells AD FS to copy over all claims from the access token to the id token. You might frown, but it’s the only way.
The ‘Permit everyone’ policy could be changed to something more strict in order to restrict access to certain users (e.g. based on group membership). However, in this post we assume these authorization decisions will be taken in Keycloak, therefore ‘Permit everyone’ is a sensible policy.
Validate the configuration and finish the wizard. The ‘keycloak’ application group should now contain both the server application created before, and the dummy API created just now.
Configuring the mapping rules
The AD FS config is almost ready. We just need to add some extra claims in the access token: email, given_name, and family_name. Since we have checked allatclaims these claims will automatically be added in the id token.
Theoretically we could issue the extra claims only if a profile scope or a claims parameter is present. However we consider that optional because we are dealing with a confidential client and because we know Keycloak needs these claims. So, to not overcomplicate matters, we simply issue the required claims irrespective of any scope or claims parameters.
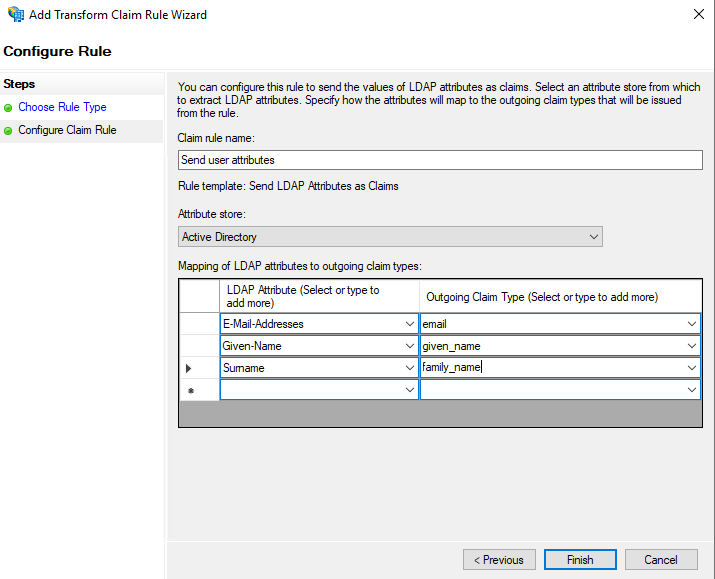
Open the ‘keycloak’ application group and double click ‘keycloak - dummy API’ to open the API configuration. Then move to the ‘Issuance Transform Rules’ tab and click ‘Add Rule…’. We will add a simple rule using the ‘Send LDAP Attributes as Claims’ template.
Use the following configuration:
- Claim rule name:
Send user attributes(you are free to choose another name) - Attribute store:
Active Directory - Mappings:
E-Mail-Addresses=>emailGiven-Name=>given_nameSurname=>family_name
Note that the above mapping names will not display in the outgoing claim type dropdown. You need to manually type them in. (The dropdown is actually editable). The names of the outgoing claim types are based on the OIDC claim naming.
You are free to pass other LDAP attributes. However, in a default Keycloak installation the above are required to be able to skip the form where more user information is asked during a user’s first login.
Adding AD FS as an Identity Provider
Keycloak has now been added as client to AD FS. Now it’s time to give Keycloak some details about AD FS.
Importing AD FS OpenID Provider configuration
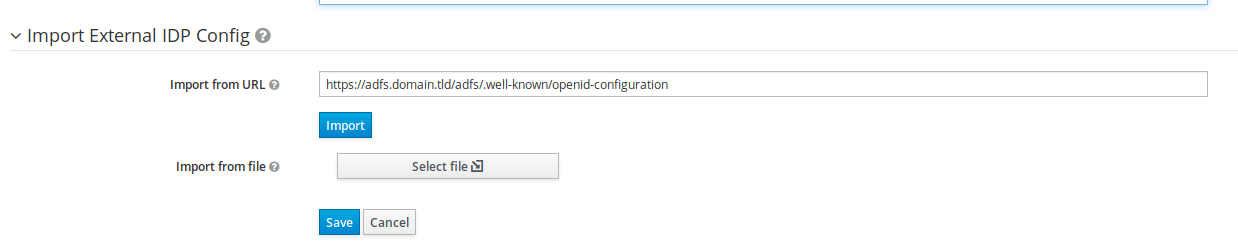
First, we must add AD FS as an OpenID Provider. Browse to the ‘Identity Providers’ screen and create a new ‘OpenID Connect v1.0’ provider. This opens a lengthy form which we can fill in manually, but it is more convenient to point Keycloak to a publicly available document with configuration data. Location, syntax and content of this document have been standardized in the OpenID Connect Discovery spec. We verify whether the document is indeed available by issuing a GET request with our favorite HTTP client, e.g. a browser, curl, Postman or HTTPie:
GET /adfs/.well-known/openid-configuration HTTP/1.1
Host: adfs.domain.tld
Don’t forget to use HTTPS by the way. The response should be a JSON document. Rather than copying the information found in the document into the form, we paste the discovery URL in the ‘Import from URL’ input box. Click Import. This populates the form.
Before saving, we need to modify a couple of things. Scroll all the way up and change the following configuration options in the section titled Add identity provider
- Alias:
ADFS(since this alias is used in the redirect URI, choosing another alias may impact your AD FS configuration)
Scroll down to the section titled OpenID Connect Config and change the following options:
- Disable User Info:
ON - Client ID:
keycloak(this must be exactly equal to the Client Identifier configured in AD FS) - Client Secret: the secret which was auto-generated during the creation of the Server Application in AD FS
User Info must be disabled since AD FS only returns the ‘sub’ claim from the userinfo endpoint. Since we have modified the id token that will be returned from AD FS, the call to the userinfo endpoint will fail and is not required anyway.

Make sure the ‘Redirect URI’ displayed at the top of the form matches the Redirect URI you have configured in AD FS during the creation of the Server Application. Then click Save.
Configuring the mapping rules
The next step is to tell Keycloak what AD FS id token claims to use for fields in its user database.
Move to the ‘Mappers’ tab in the AD FS Identity Provider screen and add three mapping rules, each of type ‘Attribute Importer’. The mapping is from Claim to User Attribute Name:
email=>emailgiven_name=>firstNamefamily_name=>lastName

Test it
AD FS 2019 is now set up as brokered identity provider in Keycloak. That means that a client which uses Keycloak as its Openid Connect Provider can have its users authenticate using MS AD FS 2019.
To quickly test the integration between Keycloak and AD FS 2019, you could open one of the clients that are present in Keycloak by default: https://keycloak.domain.tld/auth/realms/ADFS/account . In case you are not yet authenticated, you will then be able to select ADFS as identity provider.
Troubleshooting
- Do not use spaces in your Keycloak realm name. The space encoding during the retrieval of the code is different from the space encoding used when exchanging the code for a token. AD FS does not like that and fails on it.
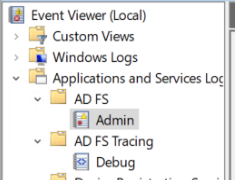
- The out of the box AD FS logging is quite good. Check Event Viewer and use
Set-AdfsProperties -AuditLevel Verboseon AD FS to increase AD FS’ log level - Run
Get-AdfsApplicationPermissionand verify the scopes linked to the keycloak client. - Use Postman + the Postman console acting as the Keycloak client. Create a new request, open the ‘Authorization’ tab, select type ‘OAuth 2.0’ and click ‘Get New Access Token’. Then use the following information:
- Token Name:
keycloak_adfs_test - Grant Type: `Authorization Code’
- Callback URL:
https://keycloak.domain.tld/auth/realms/master/broker/ADFS/endpoint - Auth URL:
https://adfs.domain.tld/adfs/oauth2/authorize - Access Token URL:
https://adfs.domain.tld/adfs/oauth2/token - Client ID:
keycloak(this must be exactly equal to the Client Identifier configured in AD FS) - Client Secret: the secret which was auto-generated during the creation of the Server Application in AD FS
- Scope:
openid - State:
random
- Token Name: